CoreStack Account Setup (Onboarding)
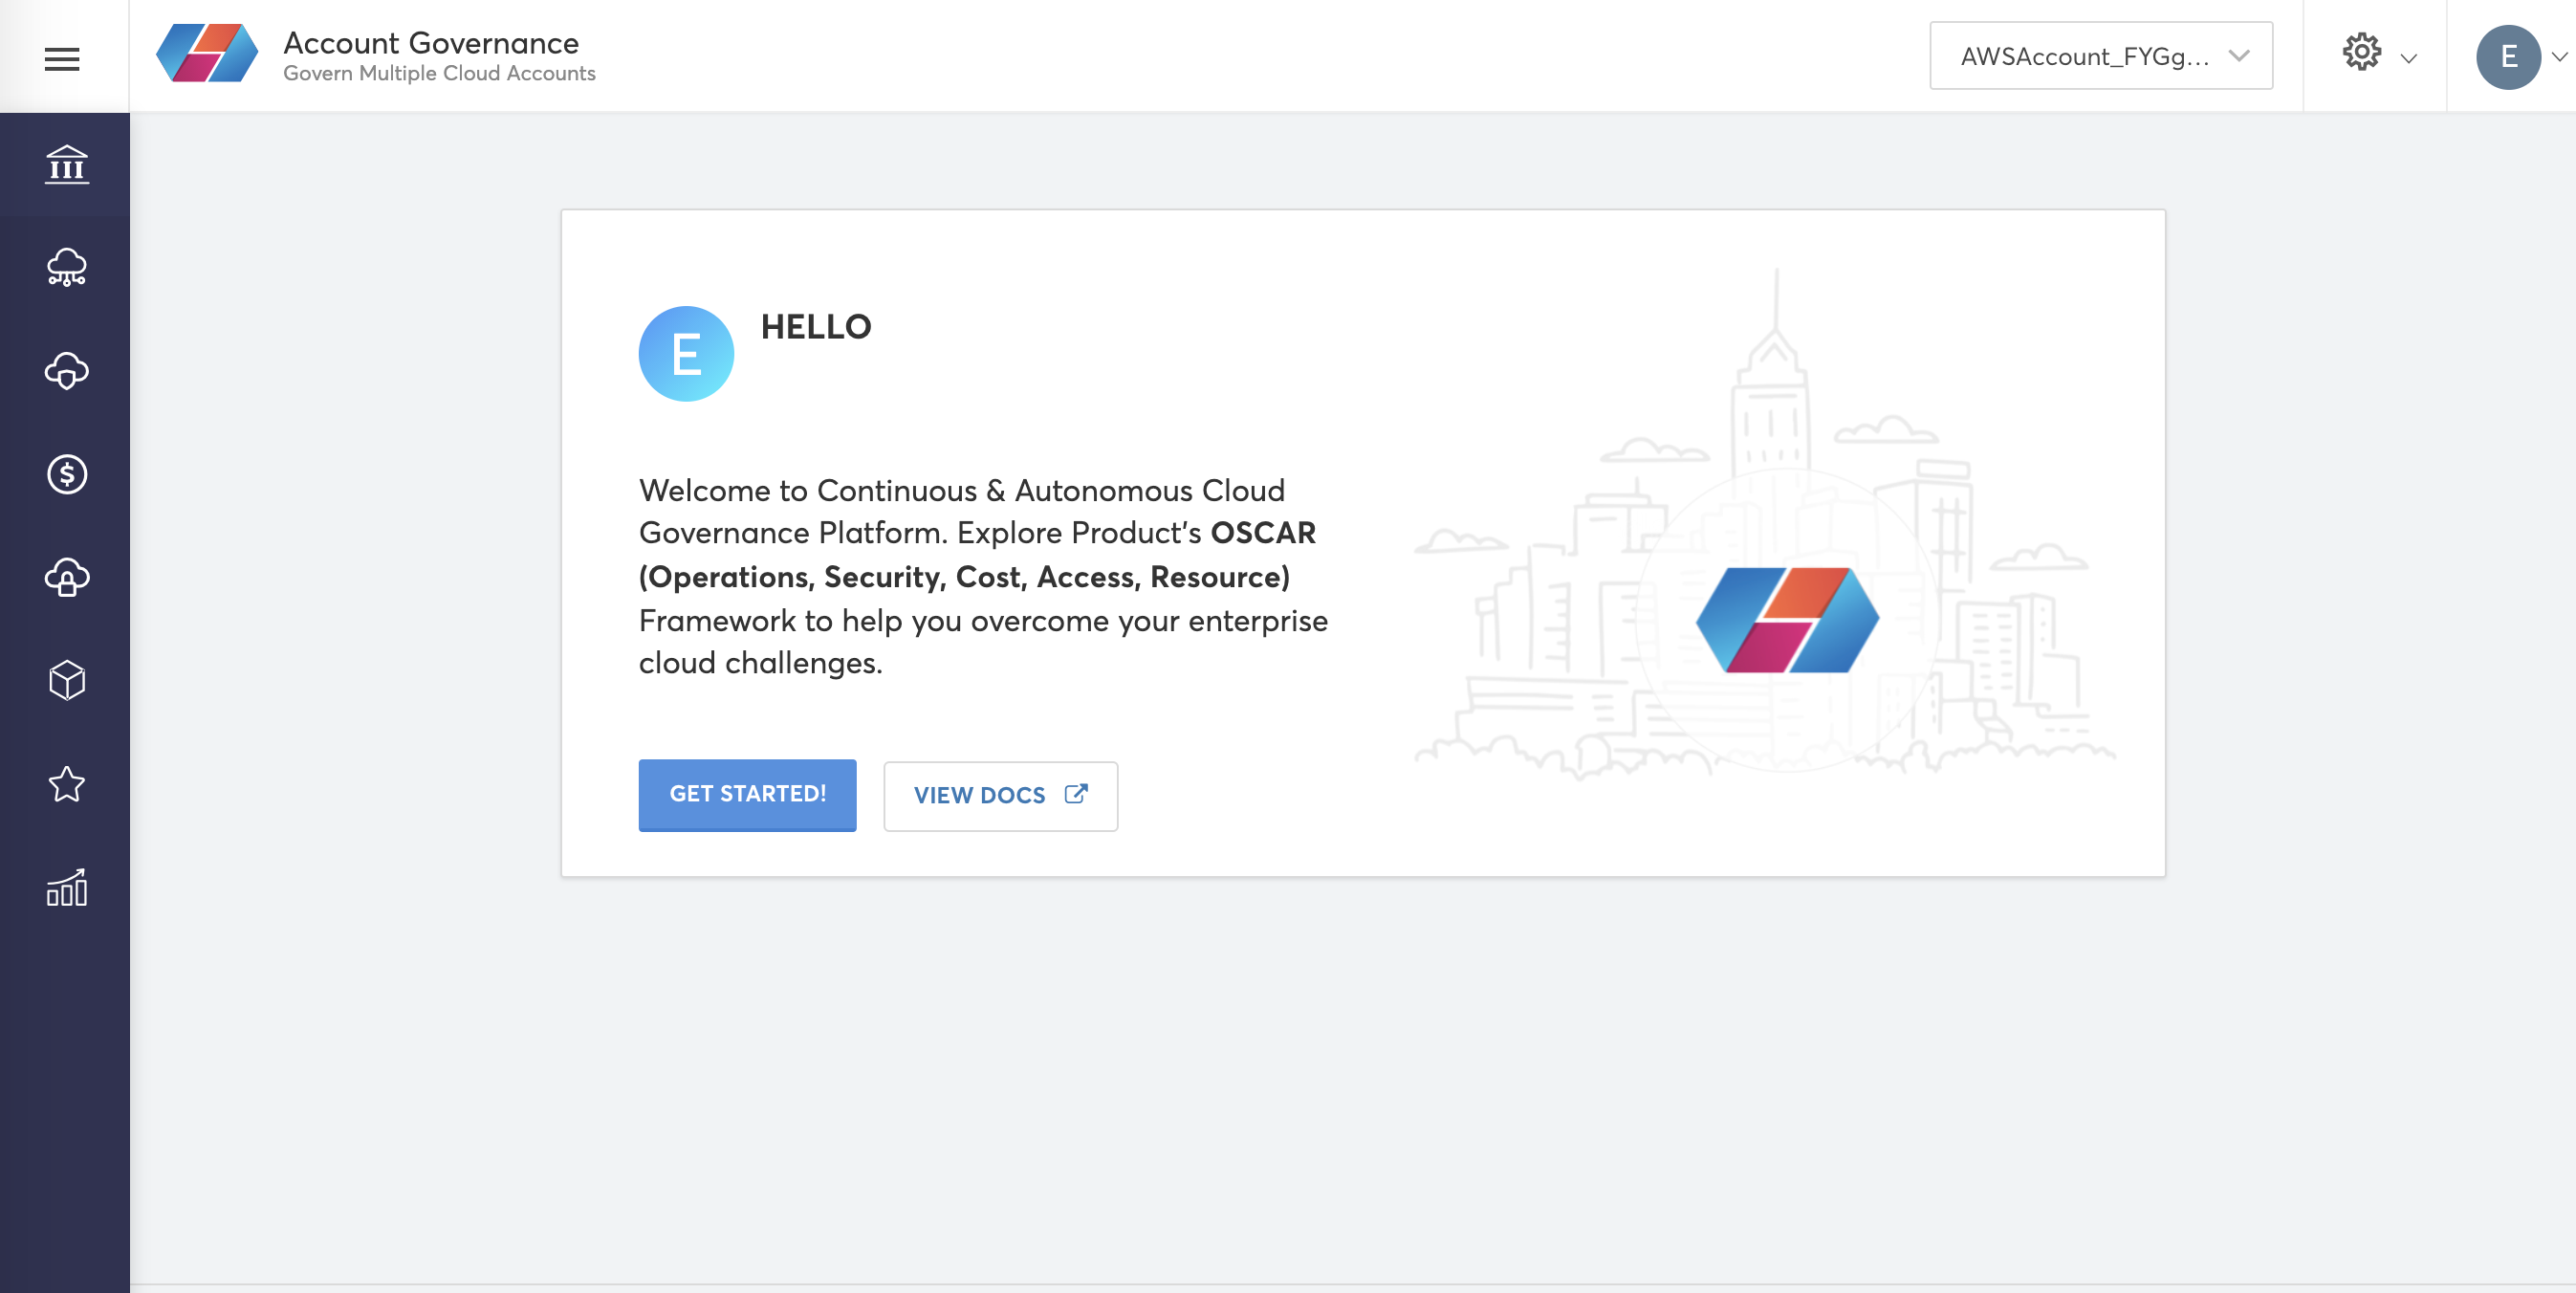
Please go to the CoreStack Dashboard. Login with the email and password you used to sign up! There should be a confirmation email sent with your login information. Your greeting page should look like this:
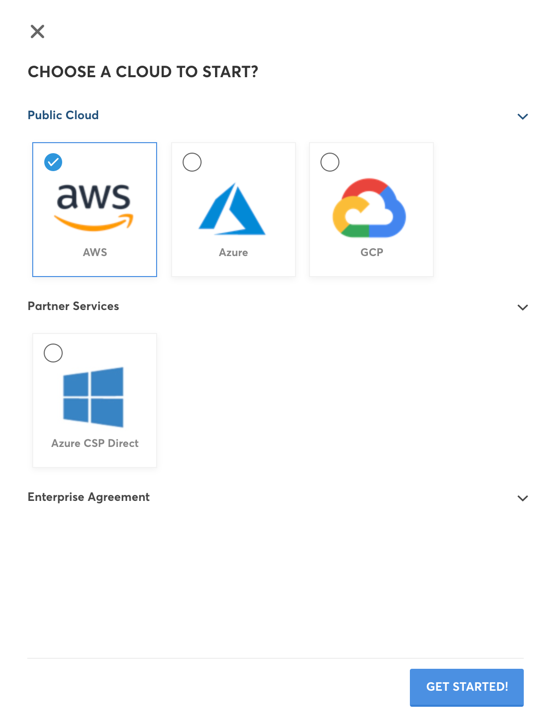
- Click the GET STARTED button and choose AWS as the public cloud on the next page
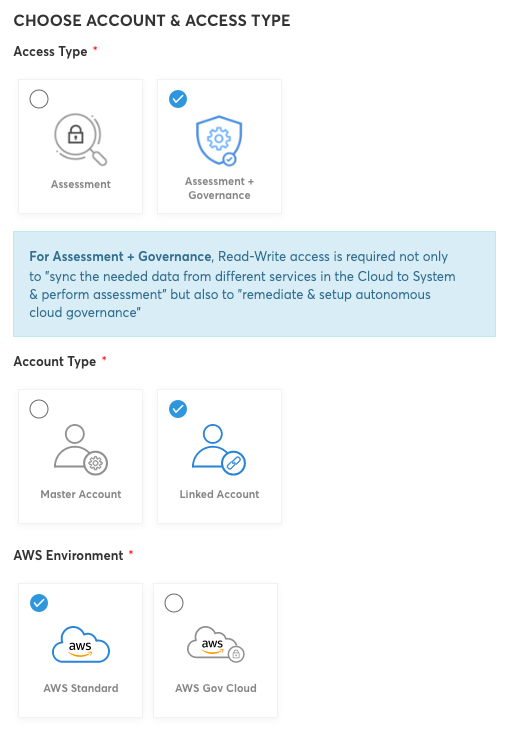
- Click the Assessment + Governance option, Linked Account option, AWS Standard option, and the AssumeRole authentication option. Click the NEXT button.
- Next, go to your AWS Management Console and search for the CloudFormation dashboard.
- Click the create stack option and copy this link CoreStack Role Creation Template and paste it into the Amazon S3 URL
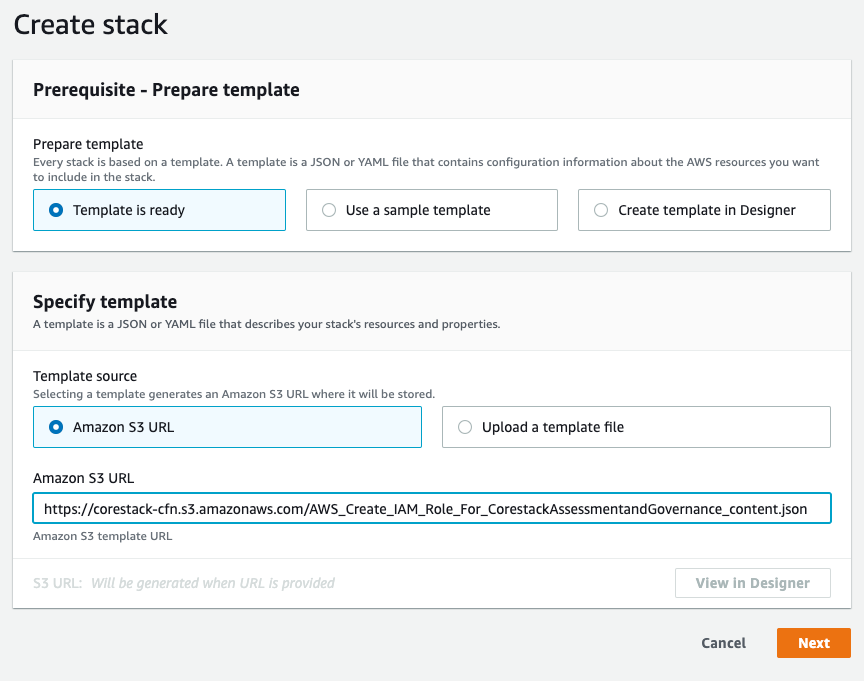
- Name the stack
CoreStack-Role-Stack, the externalId as some value, and RoleName asCoreStackAccessRole. - Click through and create the stack.
- Once the stack has finished provisioning, click on the stack and click on the outputs tab:
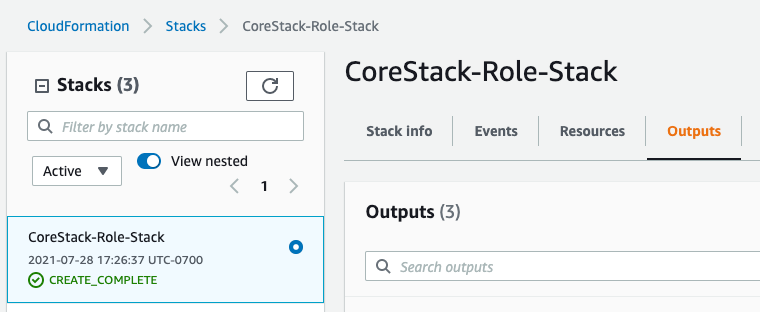
- There should be 3 outputs: the externalID you submitted, whether MFA is enabled (it should be set to false), and the role ARN. Copy the ARN and ExternalID
- Go back to your CoreStack dashboard and paste the 2 values you copied from the step before and click the VALIDATE button.
- Drop down and select the region you used to create the CloudFormation stack for the role. Click the I’M DONE button, and you have now successfully linked your AWS account to CoreStack!!
Let’s move to the next section